Waiter Management — Shifts, Sections & Table Assignments
Create per-venue waiter accounts, group tables into sections, open a shift, and assign servers to the tables they cover. Every change pushes live to every connected device.
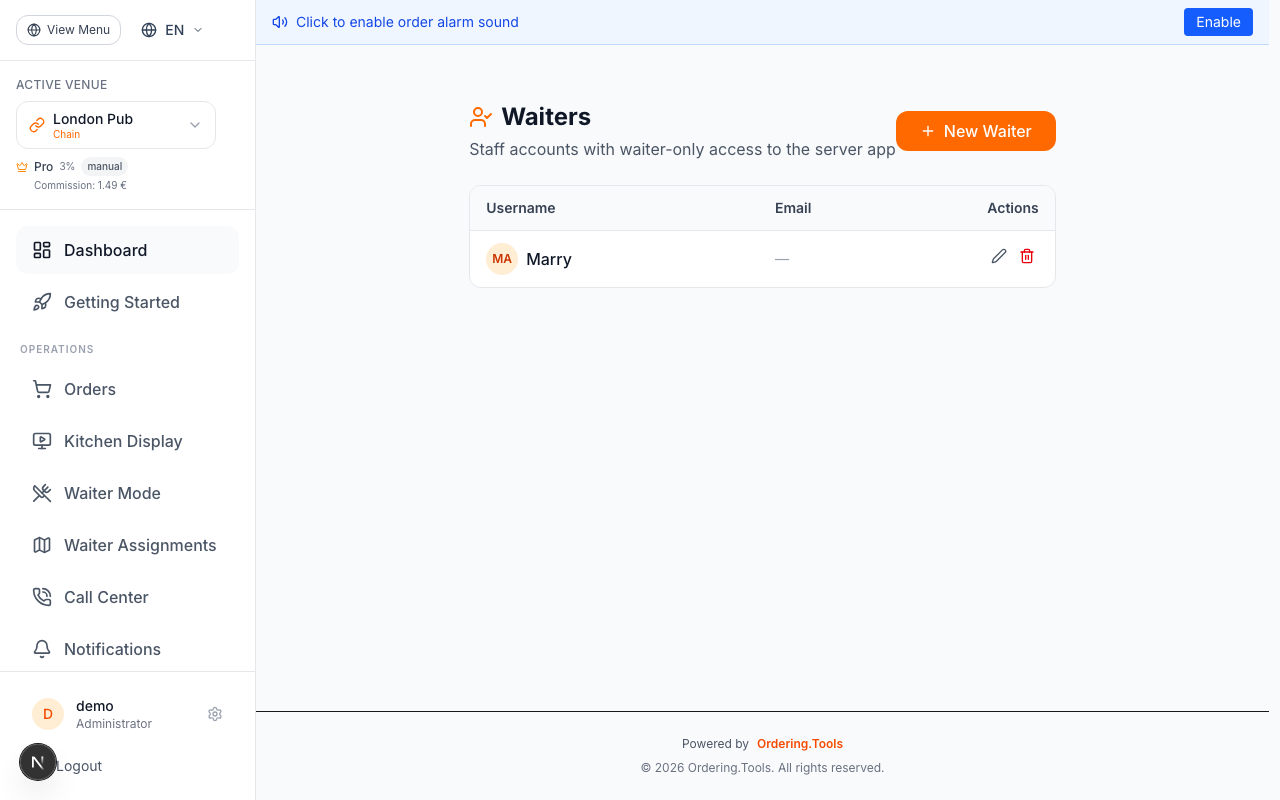
Create Waiter Accounts
Open Settings → Waiters. You'll see a list of all waiters who have access to the venue you're currently viewing — nothing from other venues, even if you share the same account across multiple locations.
Click Create Waiter and fill in:
- **Username** — what the waiter uses to log in
- **Email** — for password resets and notifications
- **Password** — at least 8 characters
- **Assigned venues** — by default the venue you're on is pre-selected; tick additional venues if the waiter covers more than one location
Save. The new waiter now appears in the list for every venue you granted them access to — and nowhere else.
The waiter role is always Server (the internal label is ROLE_SERVER). Managers and admins can work in waiter mode through their existing roles — they don't need a separate waiter account.
Waiters are scoped strictly by venue access. If you used to share staff across venues and want an existing waiter to show up on a new venue, edit the user and add that venue to their assigned list — no need to recreate the account.
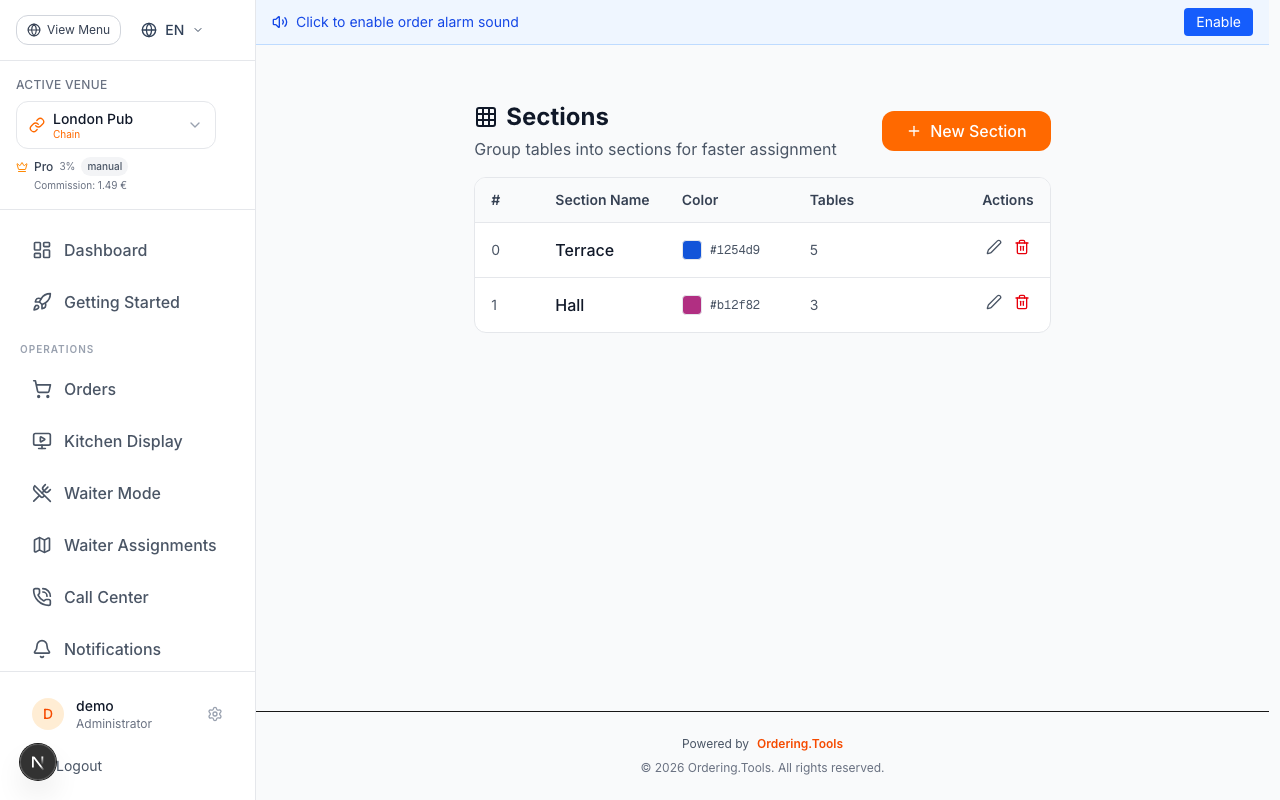
Group Tables into Sections
Open Waiter Admin → Sections. You'll see your floor laid out as a grid of tables with a panel on the right for managing sections.
Click Create Section and give it:
- **Name** — Patio, Bar, Window, Main Room, Private Events, whatever matches your floor
- **Color** — pick a distinct color so the team can scan the floor visually
- **Tables** — tick each table that belongs to this section
Save. The section appears color-coded on the grid, and every connected device updates within seconds.
Rules to keep in mind:
- A table can only belong to one section at a time. If you try to add a table that's already in another section, the system rejects it — there are never double-booked zones.
- Sections are reusable across every shift. You define the layout once and stop explaining it at every pre-shift huddle.
- Drag-and-drop still lets you move tables between sections mid-week — useful when the patio opens in spring or a private event takes the back room.
Use sections that match how your team already talks about the floor. If the staff says 'I'm on the patio tonight', call the section Patio. If they say 'I've got the window side', call it Window. Matching the vocabulary makes handovers faster.
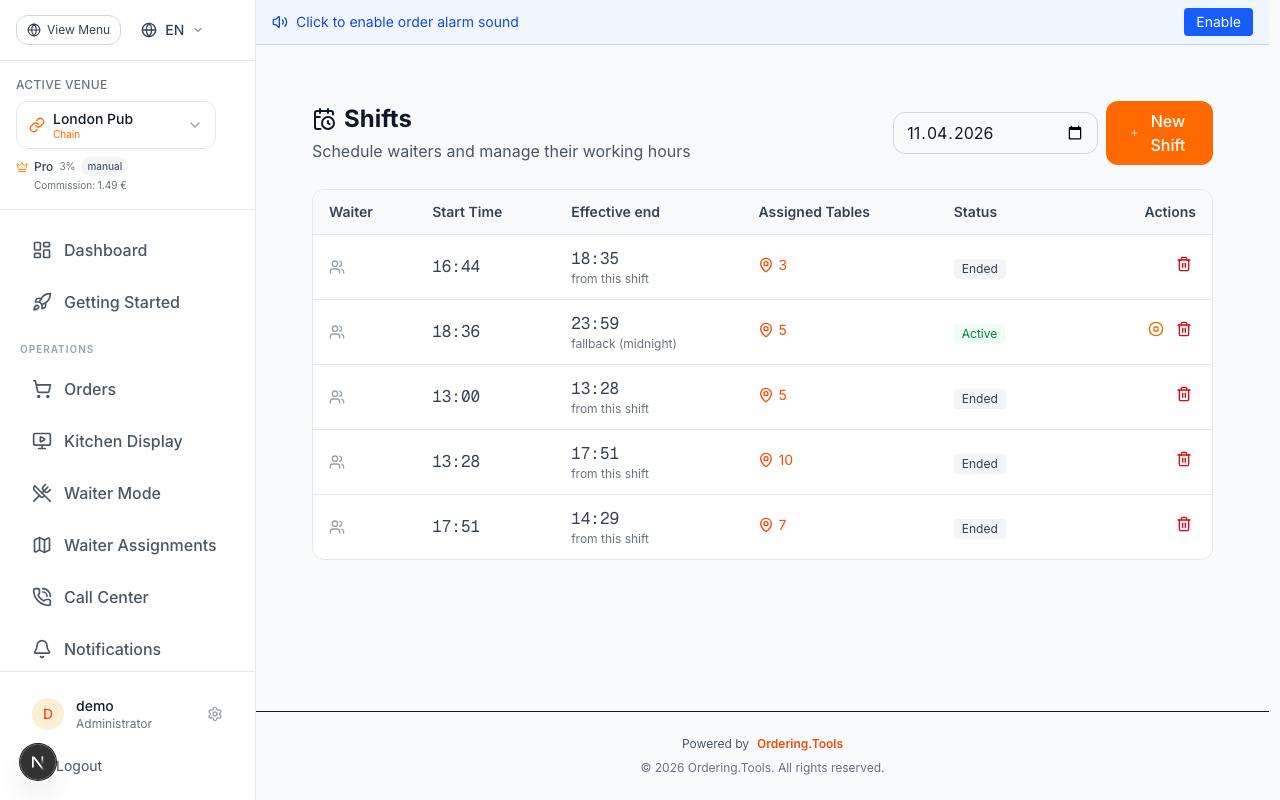
Start a Shift
When service begins, open Waiter Admin → Shifts and click Create Shift.
Fill in:
- **Waiter** — who's opening the shift (usually the manager on duty)
- **Date** — today by default
- **Start time** — when service begins
- **Schedule** (optional) — link the shift to an operating-hours schedule so the effective end time is resolved automatically
Save. The shift is now active.
Key rules:
- **One active shift per venue.** If you start a new shift while an old one is still open, the old one is automatically closed with the current time as its end. No overlapping service periods.
- **Effective end time** is resolved in this order: explicit end-time on the shift → linked schedule's close time for today → venue default working hours → midnight. rt-app and every other connected view always show the same computed end time, so there's nothing to reconcile manually.
- **End the shift** with the End Shift Now button — it sets endedAt without deleting the record, so the assignment history and order links stay attached for reporting.
If you run split shifts (lunch + dinner), start a new shift for each service window. The system keeps each shift's assignment history separate — closeout reports match what actually happened on the floor.
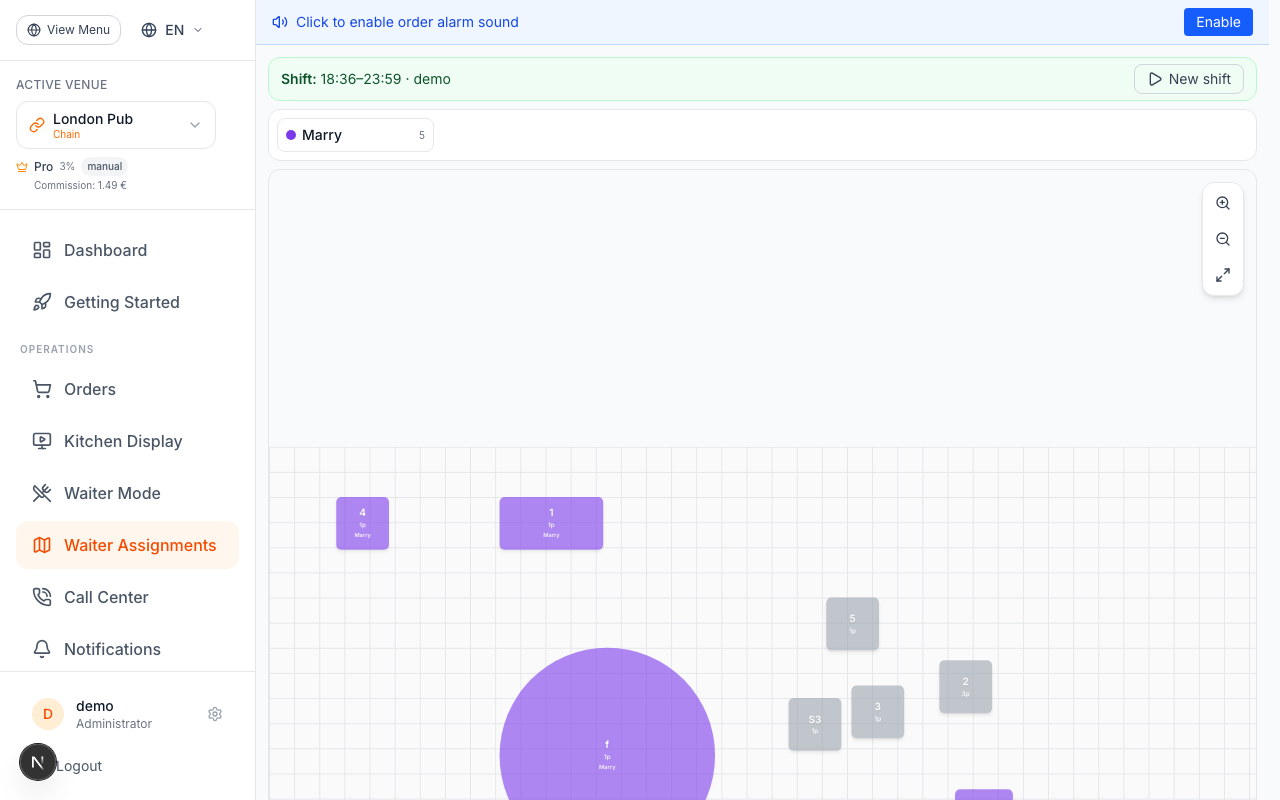
Assign Waiters to Tables or Sections
Open Waiter Admin → Assignments. The left panel lists every waiter with access to the venue; the canvas shows your floor with all sections and tables.
To assign a waiter:
1. Pick the waiter from the panel
2. Click a table to assign them to that table — or click a section name to assign them to every table in that section in one go
3. Repeat for the rest of the team
To swap coverage mid-service, click a table that's already assigned and pick a different waiter. The change pushes live to every connected device within seconds — no reprint, no announcement.
Bulk operations are available for common cases:
- Assign one waiter to a whole section
- Swap two waiters' sections in one action
- Clear all assignments for a shift and start over
Every assignment stays attached to the shift record, so when you run closeout you can see exactly who owned which table at which time.
When a waiter calls in sick or goes on break, don't 'note it down somewhere' — reassign their tables immediately. The rest of the team sees the update on their own screens and the next order routes correctly. No dropped tickets, no confusion.
Prefer a Visual Floor Plan? Use Reservation.Tools
Everything you just set up — waiters, sections, shifts, assignments — is also available through Reservation.Tools, our companion product built around a visual floor plan.
Reservation.Tools gives you:
- **Spatial floor layout** — tables drawn to scale, grouped by section, on an actual map of your dining room
- **Drag-and-drop waiter assignment** — grab a waiter's avatar and drop them on a table or section
- **Combined reservations and service** — see upcoming bookings on the same plan, so the host knows which tables are about to fill up
- **Host-station workflow** — designed for the person running the door, not just the manager in the back office
The integration is full: create a section in Ordering.Tools, and it shows up in Reservation.Tools. Start a shift in either tool, and the other tracks it. Reassign a waiter on the visual plan, and Ordering.Tools updates at the same time.
Which tool should you use? **Speed matters** → Ordering.Tools. Lists, dropdowns, and one-click bulk actions are fastest when you already know the layout by heart. **Visual context matters** → Reservation.Tools. Host stations, multi-tasking reservations-and-service, and new staff learning the floor all benefit from seeing the room.
Most operators use both: Ordering.Tools from the back office for setup and admin, Reservation.Tools at the host stand during service. Pick whichever view fits the moment.
If you already have a Reservation.Tools account linked to the same venue, your waiters and sections sync automatically — there's nothing extra to configure. If you don't, contact support to enable the integration.

Ready to Get Started?
Apply what you've learned and set up your restaurant in minutes